Cerritos Portrait Session &Fine Art Editing
Ask any photographer and they will likely say that the most time-consuming part of photography is the editing process. Of course there are gorgeous presets that offer some one-click fixes, however, presets only make general adjustments to things like tone, contrast, and saturation. I always find that there are certain adjustments I want to make that require intentional and specific choices, ones that a computer would never be able to intuit on its own. At least not yet. 😉
So let me take you through my process; one that I call fine-art editing. It is part of what you invest in when you hire me you create your portraits. And I feel it makes a world of difference.
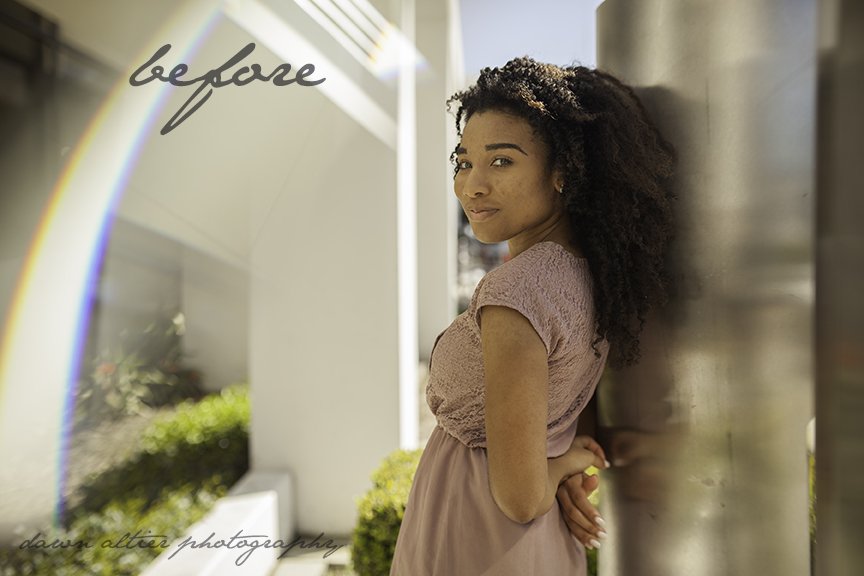
In this image you will see that Aly’s face is in shadow. I want her face to be there area of focus. In order for that to happen it needs to be brighter. First I selected her face, arm, and hands and brought up the level of “light” using a curves layer. Next I smoothed out skin tones and added a touch of color to her lips. I noticed that there were a few bright highlights on her hair which I found a little distracting so I darkened them. My eye kept getting caught on the space between the two metallic phone booths so I pulled a different view of a single booth from another image and “masked” it in. (This all happened in Photoshop CC). I removed the marks/spots from the metallic booth and took out that tiny speck to the left of the prism reflection (the rainbow curve on the left side of the image). I smoothed out her dress. Finally, I brought the saturation up just a bit on the reds, decreased the yellows, and brought up the overall brightness of the image.
And voila!
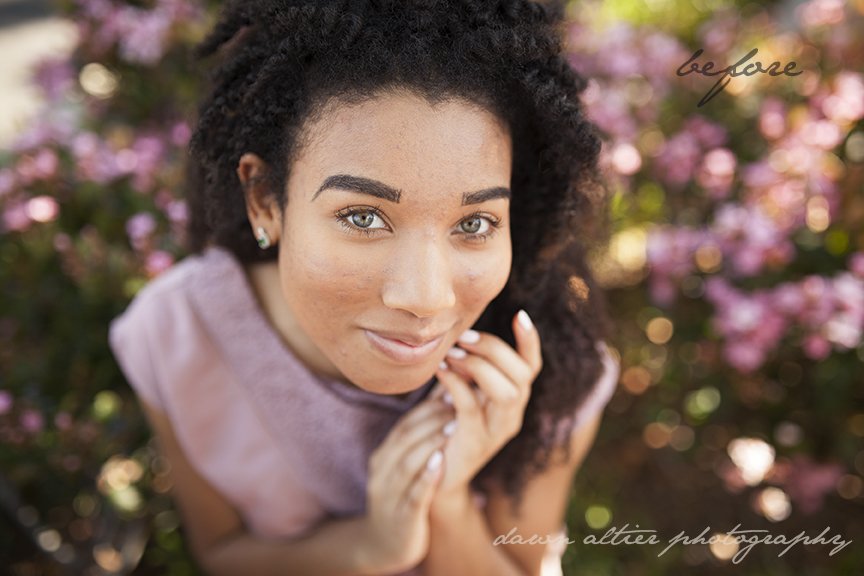
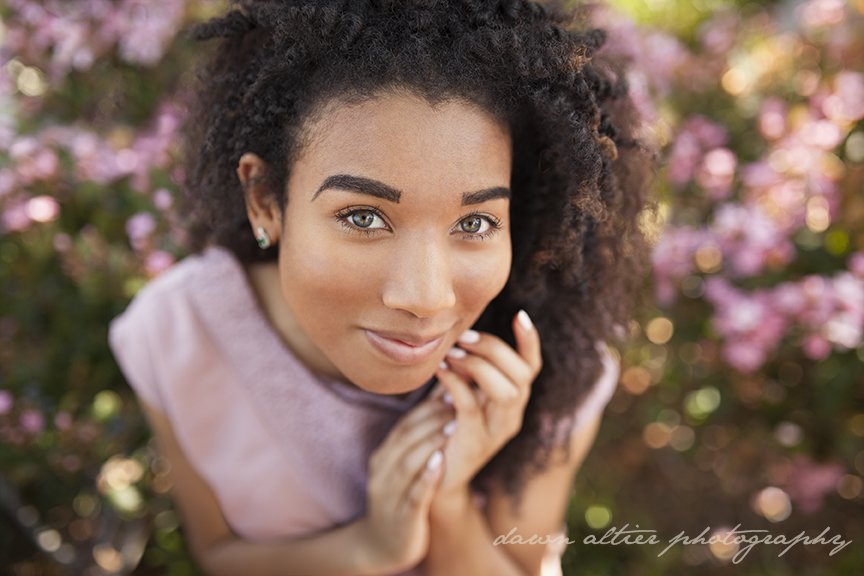
In this next image you can see that Aly’s face and hands are a bit overexposed. The first adjustment I usually make to an image is in relationship to exposure. I do this by adding a “curves” layer which adjusts the brightness of the area you select. When I felt I had an even skin tone, I moved on to smoothing the skin. I usually take several versions of the same image in case eyes are closed or squinting– that way I have options to work with. Aly’s left eye was out of focus in the primary image I was working with so I brought in a left eye from another image that was in focus. (Sounds kinda funny doesn’t it?) During the session I had adjusted Aly’s hair giving it a bit more volume in one image in this series. I brought her hair into the primary image that had the expression I liked best. I added eyeliner. Finally, I removed background distractions including really bright highlights, dimming them down, and filling in the top left corner with flowers.
Here is the final edit:
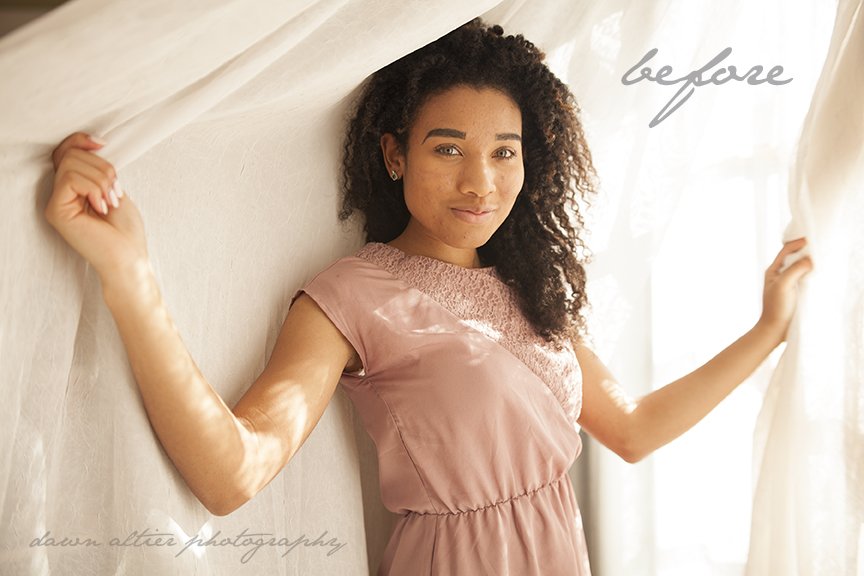
This last image was a slightly more complex process because I used three images to create the final edit. In this first image I liked the way Aly’s right arm was covered by the curtain. I also liked that I could see more of her dress at the bottom of the frame and more of the curtain to her left because I was standing further away from her for this shot. I used this image as my base. (You will notice the big yellow circles in the center– I had been experimenting with twinkle lights and two of them are very prominent here.)
I pulled Aly’s face and dress from this image as Aly’s face was mostly free from harsh highlights which were in abundance because she was standing right next to french doors.
Sometimes I reframe an image if I feel the subject is too far to one side and I feel centering the subject would look best. I centered Aly by creating parts of the curtain that weren’t there to begin with. I used the cloning tool to do this after making a copy of the image and shrinking the size of the top image so Aly had more space surrounding her. Imagine two identical images stacked on top of each other and then shrinking the upper image down so you can see the borders of the image underneath it. Aly now appeared to be centered and smaller within the frame. I merged the two images together, created extra curtains to cover up the border of the bottom image and then went to work evening skin tone, smoothing skin, removing harsh highlights on her dress, and giving her a touch of lip color and eyeliner. I then brightened selective areas of the image…. Light, airy flow!
I hope you enjoyed learning a bit about my editing process and that it helps to give you added understanding to the value of the work photographers do after they’ve taken your photos! xoxo


